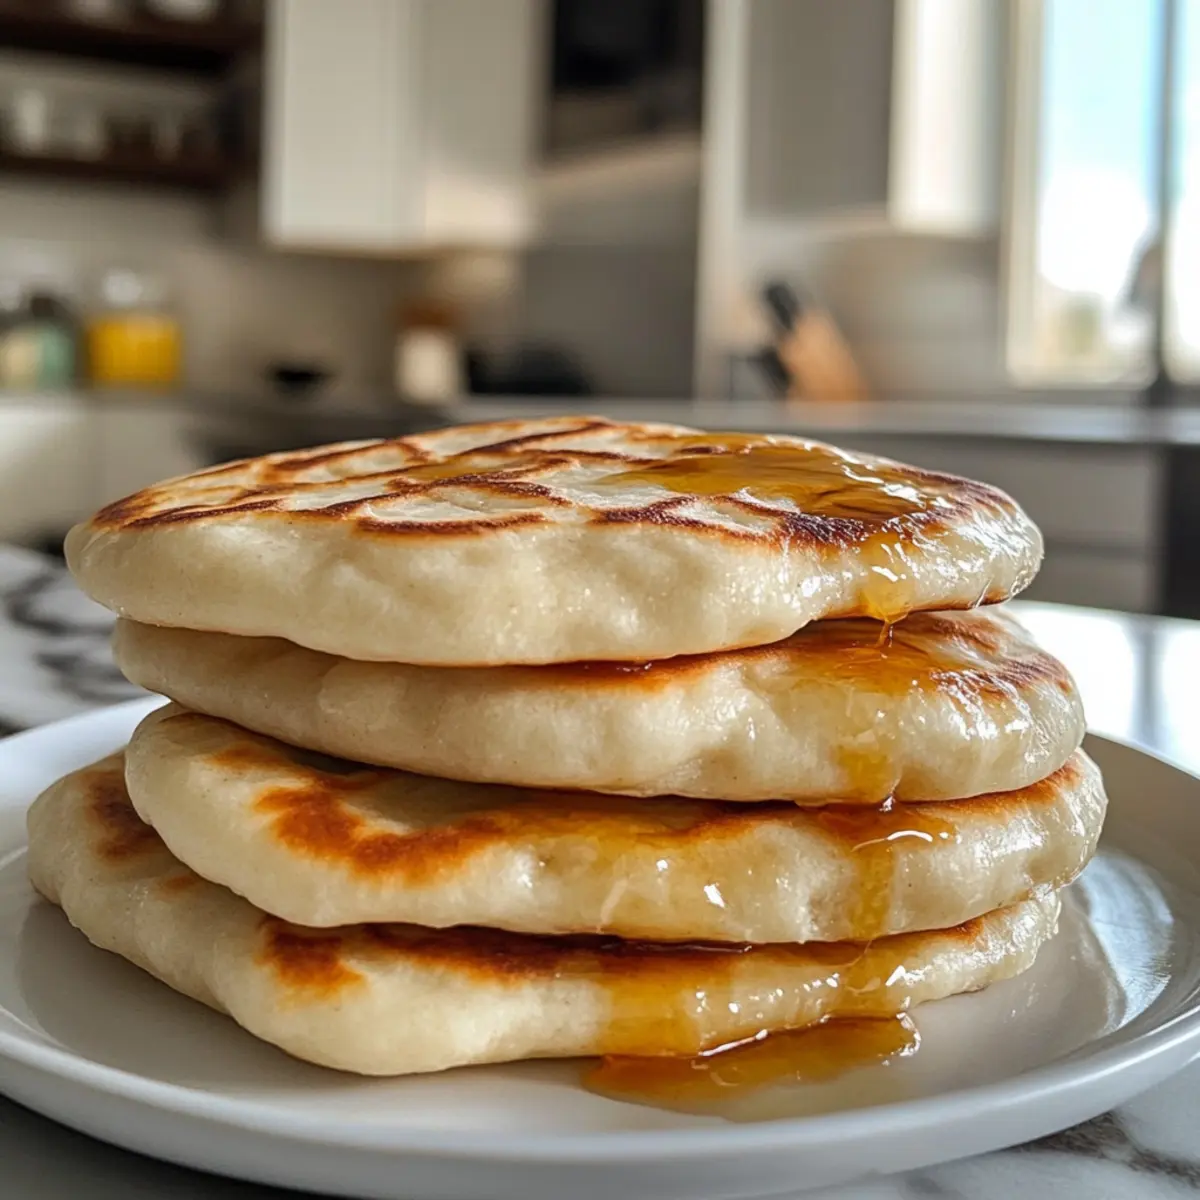
When I first decided to tackle homemade pita bread, I never anticipated the sheer delight that would fill my kitchen. The moment the dough began to puff and bubble on the skillet, releasing that warm, comforting aroma, it was as if I had unlocked the secret to a whole new world of flavor. This fluffy homemade pita bread is not just a recipe; it’s an experience that brings a touch of the Mediterranean right to your table.
Using simple pantry ingredients, you’ll create mouthwatering pitas that are perfect for dipping into creamy hummus or filling with your favorite toppings. Best of all, this recipe allows for flexible substitutions, so you can tailor it to your pantry or dietary needs. Whether you’re a seasoned chef or a kitchen novice, I promise you’ll find joy in the process and satisfaction in every bite of your fresh, fluffy pitas. Say goodbye to store-bought and hello to homemade goodness!
Why is Fluffy Homemade Pita Bread a Must-Try?
Simplicity in preparation: This recipe requires only a handful of pantry staples, making it accessible for anyone.
Fantastic Flavor: Experience the freshness that comes from homemade bread, distinct from store-bought.
Customizable Options: Substitute flours and add spices to suit your taste, unlocking endless combinations for your pleasure.
Perfect for Dipping: Soft, warm pitas are ideal for scooping up your favorite dips like creamy hummus.
Crowd-Pleaser: Serve these at gatherings, and watch them disappear—everyone loves freshly baked bread!
Healthier Choice: Homemade means you control the ingredients, making it a wholesome alternative to processed options.
Fluffy Homemade Pita Bread Ingredients
For the Dough
• All-Purpose Flour – Provides structure and chewiness; you can substitute with up to 50% whole wheat flour for a denser texture.
• Warm Water – Activates the yeast and hydrates the dough; ensure it’s around 110°F (43°C) for optimal results.
• Instant Yeast – Leavens the dough for that signature puff; if using active dry yeast, activate it first in water.
• Sugar – Feeds the yeast for a better rise; omit if desired, or use honey as a natural sweetener.
• Salt – Enhances flavor and strengthens the dough; avoid substitutions to maintain taste integrity.
• Olive Oil – Adds tenderness and flavor; can be omitted for a chewier texture.
Enjoy the process of creating this Fluffy Homemade Pita Bread that delights in every bite!
How to Make Fluffy Homemade Pita Bread
-
Activate Yeast: Combine warm water, sugar, and yeast in a bowl. Let it sit for 5-10 minutes until it becomes foamy, indicating the yeast is alive and ready to work its magic!
-
Mix Dough: Add in the all-purpose flour, salt, and olive oil. Mix until a shaggy dough forms, bringing the ingredients together into a warm, inviting mass that smells heavenly.
-
Knead: Using a stand mixer fitted with a dough hook, knead for 5-6 minutes, or knead by hand for 8-10 minutes. The dough should become smooth and elastic, ready to rise!
-
First Rise: Transfer the dough to an oiled bowl, cover it, and let it rise in a warm location for 1 to 1.5 hours until it has doubled in size—this is when the magic starts to happen!
-
Shape Dough: Punch down the risen dough and divide it into 8 equal pieces. Roll them into balls and let them rest for 10-15 minutes, allowing gluten to relax for easier rolling.
-
Roll Out: On a floured surface, roll each ball into a 1/4-inch thick circle, keeping the rolled pitas covered to prevent drying out.
-
Preheat Skillet: Heat your cast iron skillet over medium-high heat. A well-preheated skillet ensures that your pitas puff perfectly!
-
Cook Pitas: Place each rolled pita in the skillet and cook for 1-2 minutes on each side, until puffed and golden brown spots appear. Watch the magic unfold as each pita rises!
-
Serve or Store: Enjoy warm right away, or let cool completely to store. They will be delightful for days to come!
Optional: Sprinkle with a bit of za’atar for an extra flavor kick!
Exact quantities are listed in the recipe card below.

Expert Tips for Fluffy Homemade Pita Bread
-
Preheat the Skillet: Ensure your skillet is hot enough before cooking; this helps the pita to puff up beautifully, making all the difference in your fluffy homemade pita bread.
-
Roll Evenly: For even cooking, roll the dough to the same thickness across each circle. Uneven pitas may not puff or may cook inconsistently.
-
Avoid Overkneading: While kneading is crucial, too much can make the dough tough. Stop when it’s smooth and elastic to ensure that your fluffy homemade pita bread is tender.
-
Experiment with Flours: Feel free to mix in whole wheat or spelt flour, but remember that different flours will change the texture and flavor.
-
Cooking Time Awareness: Keep a close eye while cooking; a minute too long can turn golden brown into burned, so flip them when you see lovely spots appearing.
Make Ahead Options
These Fluffy Homemade Pita Bread are a great choice for busy home cooks looking to save time during the week! You can prepare the dough up to 24 hours in advance by following the first rise steps and refrigerating the dough after it has risen. Just be sure to cover it tightly with plastic wrap to prevent drying out. When you’re ready to enjoy fresh pitas, allow the dough to come to room temperature for about 30 minutes before proceeding with shaping and cooking. This ensures that your pitas will puff beautifully, just as if you made them fresh that day! Whether you’re batch-prepping for a busy weeknight or planning for a gathering, these tips will keep your pita as delicious as ever.
What to Serve with Fluffy Homemade Pita Bread?
When you’re ready to take your dining experience to the next level, these delightful pairing ideas will elevate your meal to new heights.
-
Creamy Hummus:
Dip into this classic Mediterranean spread, where the smooth, garlicky flavors complement the warm pitas perfectly. -
Tzatziki Sauce:
Refreshing and tangy, this cucumber yogurt dip offers a cool contrast to the warm, fluffy bread. -
Mediterranean Salad:
Diced cucumbers, tomatoes, and olives dressed in lemon vinaigrette provide a burst of freshness and crunch. -
Stuffed Pitas:
Fill your warm pitas with grilled chicken or falafel for a satisfying, handheld meal that’s packed with flavor. -
Roasted Vegetables:
Caramelized veggies bring sweetness and depth, making each bite a symphony of textures and tastes. -
Olive Oil and Balsamic Vinegar:
For a simple yet delicious dipping option, swirl pitas in the rich and flavorful mix for an Italian twist. -
Stuffed Grape Leaves:
Pair your pitas with these savory rolls for a traditional Mediterranean experience that delights the palate. -
Grilled Lamb Skewers:
The bold flavors of perfectly seasoned lamb bring a hearty element that pairs wonderfully with the lightness of the pitas. -
Mint Lemonade:
Refresh with this zesty drink, as the bright citrus and mint will cleanse your palate between bites of pita. -
Baklava:
For dessert, try this sweet pastry filled with nuts and honey, balancing the meal with delightful sweetness.
How to Store and Freeze Fluffy Homemade Pita Bread
Room Temperature: Allow completely cooled pitas to be stored in zip bags or an airtight container at room temperature for up to 2 days for optimal freshness.
Fridge: If you want to keep your pita for longer, refrigerate them in an airtight container for up to 5 days. Just warm them up before serving for the best texture.
Freezer: For extended storage, freeze pitas by placing parchment paper between each round and sealing in a freezer bag. They can last for up to 3 months; simply thaw before use.
Reheating: To enjoy your fluffy homemade pita bread, reheat in a skillet over medium heat for 1-2 minutes or wrap in a damp paper towel and microwave for 15-20 seconds.
Fluffy Homemade Pita Bread Variations
Customize your pita experience with these exciting twists and substitutions that cater to every taste!
-
Whole Wheat: Swap half of the all-purpose flour for whole wheat flour for a nutty flavor and added fiber.
-
Herbed Dough: Mix in dried herbs like oregano or rosemary into the dough for a fragrant, Mediterranean touch. This enhances the aroma while adding a delicious layer of flavor that’s simply irresistible.
-
Spice it Up: Add ground spices like cumin or paprika to the dry ingredients for a warm, spicy note in each bite. Perfect for those who want their pitas to stand out!
-
Garlic Infusion: Incorporate garlic powder directly into the dough for a tasty hint of garlic goodness. It pairs beautifully with dips, elevating your overall experience.
-
Different Oils: Substitute olive oil for avocado or melted coconut oil to create varied taste profiles that can change the character of your pitas.
-
Chickpea Flour Twist: Use chickpea flour in place of half the all-purpose flour for a hearty, protein-packed option that’s gluten-free.
-
Add Seeds: Sprinkle sesame or poppy seeds on the dough before baking for added texture and a bit of crunch. It’s a fun way to make your pita bread even more visually appealing.
-
Sweet Pitta: For something different, incorporate a tablespoon of honey or maple syrup into the dough for a subtle sweetness that works well with dessert dips. This is a delightful surprise at the dinner table!

Fluffy Homemade Pita Bread Recipe FAQs
What type of flour is best for making fluffy homemade pita bread?
For the best results, all-purpose flour is ideal as it provides the structure and chewiness necessary for pitas. However, you can substitute up to 50% with whole wheat flour for a nuttier taste and denser texture. Just remember that too much whole wheat can affect the puffs.
How do I store homemade pita bread to keep it fresh?
Once your fluffy homemade pita bread has completely cooled, it can be stored in zip bags or an airtight container at room temperature for up to 2 days. If you want to keep it longer, refrigerate for up to 5 days, ensuring to warm it before serving for the best texture.
Can I freeze pita bread, and if so, how?
Absolutely! For optimal freezing, layer parchment paper between each pita and place them in a freezer bag. This way, they won’t stick together and can last for up to 3 months! Just remember to thaw before use; you can reheat them directly in a skillet or wrap in a damp paper towel and microwave.
What should I do if my pitas don’t puff up while cooking?
If your pitas aren’t puffing, the most common culprits are under-kneading or inadequate heat. Ensure your dough is smooth and elastic, and make sure your skillet is hot enough—preheating is key. If cooking in the oven, consider using a pizza stone for even heat distribution.
Can pets eat pita bread?
While pita bread isn’t toxic to pets, it’s best to give it sparingly and avoid any ingredients like salt or oil. Always consult your vet before sharing human food with your furry friends, especially if they have specific dietary needs or allergies.
Is there an alternative sweetener I can use for the sugar in this recipe?
Certainly! If you’re looking to avoid regular sugar, natural alternatives like honey or agave syrup can be fantastic substitutes. Just remember to use a smaller amount—about half the quantity—since these sweeteners are sweeter than sugar!

Fluffy Homemade Pita Bread: The Best Comfort Food Experience
Equipment
- Stand mixer
- Cast-Iron Skillet
- mixing bowl
- Rolling Pin
Ingredients
For the Dough
- 3 cups All-Purpose Flour Can substitute with up to 50% whole wheat flour for a denser texture.
- 1 cup Warm Water Around 110°F (43°C) for optimal results.
- 2 teaspoons Instant Yeast If using active dry yeast, activate in water first.
- 1 tablespoon Sugar Omit if desired, or use honey as a natural sweetener.
- 1 teaspoon Salt Avoid substitutions to maintain taste integrity.
- 2 tablespoons Olive Oil Can be omitted for a chewier texture.
Instructions
How to Make Fluffy Homemade Pita Bread
- Combine warm water, sugar, and yeast in a bowl. Let it sit for 5-10 minutes until it becomes foamy.
- Add in the all-purpose flour, salt, and olive oil. Mix until a shaggy dough forms.
- Knead for 5-6 minutes with a stand mixer or 8-10 minutes by hand until the dough is smooth and elastic.
- Transfer the dough to an oiled bowl, cover it, and let it rise in a warm location for 1 to 1.5 hours until it has doubled in size.
- Punch down the risen dough and divide it into 8 equal pieces. Roll them into balls and let them rest for 10-15 minutes.
- On a floured surface, roll each ball into a 1/4-inch thick circle.
- Heat your cast iron skillet over medium-high heat.
- Place each rolled pita in the skillet and cook for 1-2 minutes on each side until puffed and golden brown.
- Enjoy warm right away or cool completely to store.
Notes


Leave a Comment